The first time I tried to teach my dog to sit, I spent twenty minutes repeating the word “sit” while he wagged his tail and looked at me like I was mildly entertaining.
Not sitting. Not even close to sitting.
I was holding the treat too high.
I was saying the word too many times.
I was rewarding him at the wrong moment.
I was doing almost everything wrong — and I had no idea.
In the second session, I changed one thing: I moved the treat slowly back over his head instead of holding it up in the air. His bottom hit the ground within sixty seconds. I said, “Sit.” I gave him the treat immediately.
He looked at me like something had clicked.
It had.
How to teach a dog to sit step by step is actually one of the simplest things you will ever teach your dog — but only when you understand the exact mechanics behind it. This guide gives you the precise method, the common mistakes that add weeks to the process, and exactly what to expect at every stage.
You will have to sit for days. Let’s go.
The moment their rear touches the ground, say “sit” and reward immediately. Most dogs learn the sit command within 3 to 5 training sessions of 5 minutes each.
Why Sit Is Always the First Command to Teach
There’s a reason every dog trainer — from first-time owners to professional competitors — starts with the sit command. It’s not arbitrary. Sitting is first for specific, practical reasons that make every command you teach afterward significantly easier.
Sit is the foundation command of dog training because it requires your dog to stop, focus, and respond to a cue — the three skills needed for every other command that follows.
It’s the Easiest Command to Demonstrate Physically
Unlike down, stay, or recall — sit requires almost no complex movement from your dog. A simple upward movement of the treat causes the behavior to happen naturally. The mechanics work with your dog’s body,
not against it. That means faster learning, faster success, and faster confidence building for both of you.
It Builds the Training Foundation
The moment your dog understands that responding to a verbal cue earns a reward, the entire game of training opens up. Sit teaches your dog the rules of the training system — not just one position.
According to the American Kennel Club, sit is the recommended first command for all dogs because it establishes impulse control, focus on the handler, and the reward-based learning pattern that forms the foundation of all further obedience training.
It Has Immediate Real-Life Value
A dog that sits on cue is a dog that can:
- Stop at a curb before crossing a road
- Greet visitors without jumping on them
- Wait calmly before meals without lunging at the bowl
- Pause at the door before rushing outside
- Settle during nail trims, vet exams, and grooming
Every one of these practical life situations uses the sit as the control point. You’re not just teaching a trick. You’re teaching a safety behavior that will matter every single day.
For better control outside the house, pair this with our leash training a puppy that pulls on walks guide so your dog learns to stay calm on walks too.

How to Teach a Dog to Sit Step by Step
Here is the exact method that works. Follow every step precisely — especially the timing rules — and you will have a reliable sit within 3 to 5 sessions.
Step 1 — Set Up for Success Before You Start
Environment: Choose a small, quiet room inside your home. No other dogs, no children running around, no TV on. Distractions compete with your dog’s attention, and learning cannot happen above a certain threshold of stimulation.
Treats: Use small, soft, smelly treats that your dog genuinely loves. Pieces of cooked chicken, small soft commercial treats, or tiny cheese cubes work perfectly. Each piece should be about the size of a pea — small enough to give many repetitions without filling your dog up.
Your energy: Calm and upbeat. Not excited and frantic, not flat and bored. The tone that makes dogs learn fastest is warm, focused enthusiasm.
Zuke’s Mini Naturals Chicken Training Treats — soft bite-size pieces, real chicken flavor, added vitamins and minerals, no corn/wheat/soy, and only 2 calories per treat — fits perfectly when the article asks for small, soft, high-value training rewards.
Not For : Not ideal for dogs with chicken sensitivity or owners who prefer using plain cooked chicken or tiny cheese cubes instead.
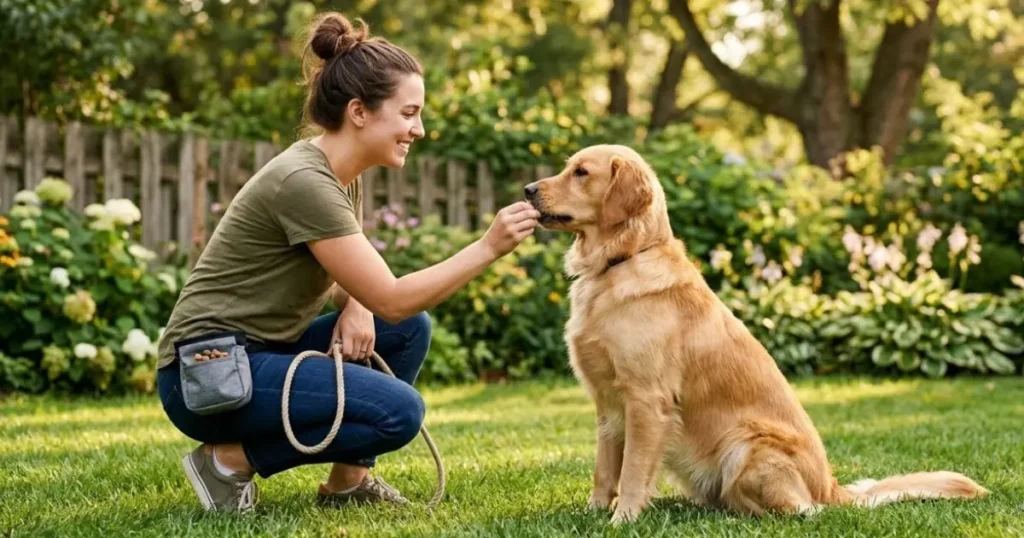
Step 2 — Load the Lure
Hold a treat right at your dog’s nose — literally touching it if they’ll let you. Let them sniff it. Let them want it. You want their complete attention locked on that treat before you move a single inch.
This is called loading the lure. The treat becomes a magnet. Where the treat goes, the nose follows. Where the nose goes, the body follows. That’s the entire mechanical principle of lure training in one sentence.
Step 3 — The Lure Movement — This Is Everything
This step is where most owners go wrong. The movement has to be right.
Keep the treat close to their nose — within an inch or two. Not above it. Not far ahead of it.
Move the treat back toward the tail slowly. Imagine you are drawing a line from their nose to the back of their head.
Keep the treat low. If you hold it too high above their head, they will jump up rather than sit down. The treat should move back, not up.
As the nose tilts back to follow the treat, the natural physics of a dog’s body causes the rear end to lower toward the ground. You are using anatomy, not force.
The moment you see the rear end heading down, do not rush. Let it complete naturally. The moment both back legs are on the ground in a full sit, that is your window.
Step 4 — Mark and Reward at the Right Moment
The moment both back legs hit the ground — say “sit” in a clear, calm, single word. Then immediately give the treat.
The reward for a sit must happen within 1 to 2 seconds of the dog’s rear touching the ground — the brain cannot connect behavior to reward after this window closes.
This timing is the difference between training that works in 3 sessions and training that takes 3 weeks. The word “sit” must come at the exact moment of the position — not before, not after.
What most owners do wrong: they wait until the dog has been sitting for 3 seconds before rewarding. By then, the dog’s brain has already moved on to what it will do next. The connection is lost.
What works: the moment the rear hits the ground, the word comes, the treat comes. One second of crisp, precise reward delivery.
Step 5 — Release and Reset
Once you’ve rewarded the sit, say your release word —”okay” or “free” — to tell your dog the sit is done. Take one step to the side or move slightly to reset their position, and go again.
Do 8 to 10 repetitions per session. No more. Short and focused beats long and sluggish every time.
End every session with a successful repetition — never end on a failed one. If the last rep doesn’t work, go back to something easier and end on that. Your dog’s brain consolidates the most recent experience most strongly.
One word. Then lure. Every single time. This single habit separates owners whose dogs sit on the first cue from owners who are still repeating themselves six months later.

Adding the Verbal Cue — When to Introduce the Word
This surprises most new trainers — you shouldn’t say the word “sit” at all in the first few repetitions.
Here’s why. In the early stages, your dog has no idea what “sit” means. They’re responding to the lure movement, not the word. If you say “sit” during the movement phase, the word becomes associated with movement and confusion rather than the position itself.
The Right Timing for the Verbal Cue
Phase 1 — Sessions 1 to 3:
Say “sit” at the exact moment the rear hits the ground. Not before. Not during the movement. At the moment of completion. This is called capturing the behavior with the cue.
Phase 2 — Sessions 4 to 6:
By now, your dog is starting to anticipate the movement. Begin saying “sit” a half second before you start the lure movement. You’re starting to attach the word to the incoming action.
Phase 3 — Sessions 7 onwards:
Say “sit” clearly and pause half a second before moving the lure. See if your dog begins to move into position on the word alone. If they do — enormous reward, big celebration.
Testing Without the Lure — When You’re Ready
After 8 to 10 successful lure sessions, test this:
Stand in front of your dog. Say “sit” in the same calm, clear voice. Do not move the treat yet.
If your dog sits — jackpot. Give them the biggest reward of the session and celebrate genuinely. If your dog doesn’t sit — no problem. Help them with the lure immediately. Not every dog is ready at the same session count.
Most dogs respond to the verbal “sit” cue without a lure after 10 to 15 successful lured repetitions — though the exact number varies by dog, age, and consistency of training.
Most dogs transition off the lure between sessions 8 and 15. Some faster. Some slower. All normal.
Fading the Lure — How to Stop Using Treats in Hand
Once your dog responds to the verbal cue reliably, begin fading the treat from your hand:
Session 1 of fading: Hold the treat in the other hand instead of the luring hand. Lure with an empty hand. On the other hand, after sitting.
Session 2 to 3 of fading: Use hand signal only — the same backward movement, but empty. Reward from a treat pouch or pocket after sitting.
Session 4 onwards: Verbal cue only. Reward from the pocket. Vary the timing of the reward — sometimes immediate, sometimes after 2 to 3 seconds in position.
The goal is a dog that sits on word alone, in any location, with the reward appearing unpredictably. That is a truly trained sit.
Gobeigo Dog Treat Pouch — 4-cup capacity, removable silicone liner, magnetic closure, and belt clip/waist belt/crossbody wear — keeps rewards easy to grab from your side when the article tells readers to reward from a treat pouch instead of the luring hand.
Not For : Not ideal if you only train indoors for a few minutes and are happy keeping treats in a pocket.
According to the ASPCA, fading the lure gradually is essential for building genuine stimulus control — dogs that are never weaned off food in hand will only sit when they can see a treat, not on a verbal cue alone.
Building Duration and Reliability — Beyond the Basic Sit
A dog that sits for half a second when you’re standing directly in front of them in the kitchen is a dog that has learned the beginning of sit. A dog that sits for 30 seconds, at a distance, in a park, with other dogs nearby — that dog knows sit.
The difference is proofing. And most owners skip it entirely.
Adding Duration — How Long to Hold the Sit
Once your dog sits reliably on the verbal cue, begin building duration before releasing.
Never increase duration by more than 50% per session.
If you jump from 5 seconds to 30 seconds in one day, your dog will fail, get confused, and the duration will fall apart.
Add duration slowly. Reward generously during the hold — not just at the end.
To build that next level of reliability, follow our guide on how to train a dog to stay with distractions after your dog understands the basic sit.
Adding Distance — How Far to Move Away
Once duration is solid at 15 to 20 seconds, add distance.
Start by taking one step back. Return, reward.
Two steps back. Return, reward.
Then 5 feet. Then across the room. Then out of sight for 2 to 3 seconds.
Never call your dog out of a sit — always return to reward the position. Calling them out teaches them that moving out of position is what earns the reward.
For the separate “come” cue, use our dog recall training step by step guide so your dog learns to return without breaking position early.
Proofing in New Environments — The Critical Step
This is where real-world reliability is built. Your dog sitting in the kitchen and your dog sitting in
a park are essentially two different behaviors in your dog’s brain.
Every new location requires going back to basics:
This “checking in” habit builds focus in new environments faster than any other technique. Within 4 to 6 weeks of consistent practice, your dog will start offering sits automatically in new places just to check whether a reward is coming.
Common Mistakes That Add Weeks to Sit Training
I made all of these in my first month. Here’s what not to do — and what to replace each mistake with.
Holding the Treat Too High
This is the most common mistake by far. When the treat is held high above the dog’s head, the natural response is to jump up to reach it — not to sit down.
The treat must move back and slightly up over the dog’s head, staying close to the nose the entire time. Think parallel to the ground, not vertical.
Saying the Command Multiple Times
“Sit. Sit. Sit sit sit. Come on. Sit.”
Every repetition of the word before the dog performs the behavior trains the dog to wait for multiple repetitions. You are literally teaching them that one “sit” doesn’t mean anything.
One word. Once. Then lure immediately if needed.
Rewarding Too Late
Handing the treat 5 seconds after the sit has happened teaches your dog that whatever they were doing when the treat arrived is what earned it — which might be sniffing your hand, looking away, or starting to stand.
The reward must connect to the sit position. That means within 1 to 2 seconds. Every time.
Pushing the Dog Into Position
Physically pushing a dog’s rear down to force a sit creates resistance, not understanding. Dogs resist pressure. You’ll get a dog that fights you or avoids the training position, not one that understands the command.
Lure the position. Always. Force has no place in positive reinforcement training.
Moving to New Environments Too Fast
Your dog sits reliably at home. You take them to the park and they act like they’ve never heard the word.
This isn’t stubbornness. Dogs don’t generalize automatically. A command learned in one place needs to be re-taught — at a much easier level — in every new environment.
Going to a new place and expecting the same performance as at home is like asking someone to take an exam in a foreign language the first time they’ve visited the country.
Start easy in every new location. Build back up.

How Long Does It Take to Teach a Dog to Sit
This is the most common question — and the honest answer varies more than most guides admit.
Most dogs learn to sit on a verbal cue within 3 to 7 training sessions of 5 minutes each, though reliable sit in any environment takes 4 to 8 weeks of consistent practice.
Timeline by Stage
What Slows the Process Down
Sessions longer than 10 minutes — mental fatigue reduces learning speed dramatically.
Inconsistent practice — 3 sessions a week is the absolute minimum, daily is significantly better.
Multiple people training with different methods — everyone must use the same cue, same lure, same reward.
High-distraction environments too early — always build in low distraction first.
What Speeds the Process Up
Short daily sessions — 5 to 8 minutes twice per day.
High-value treats — the more your dog loves the reward, the faster the learning.
Clicker or consistent marker word — “yes” at the exact moment of the sit bridges the reward timing
perfectly.
Training before meals — a slightly hungry dog is a more motivated learner.
Chadou Training Clicker — 2-pack with wrist strap, simple handheld click sound, and pet behavior-training use — gives beginners a precise marker tool when they want a cleaner signal than saying “yes” every time.
Not For : Not ideal if you already use one consistent marker word with perfect timing and don’t want another tool in your hand.
Hip dysplasia and other orthopedic conditions common in breeds like German Shepherds, Labrador Retrievers, and Golden Retrievers can make sitting uncomfortable or painful.
Never force a dog to perform a position if they’re resisting without an obvious behavioral cause.
Every dog is different — if your dog shows fear, pain, or aggression during training, consult a certified professional trainer or your veterinarian.
Frequently Asked Questions (FAQ)
How long does it take to teach a dog to sit?
Most dogs learn to perform a lured sit within the first 1 to 2 training sessions.
Responding to the verbal cue without a lure typically takes 8 to 15 repetitions across 3 to 5 sessions.
Full reliability in any environment — parks, pet stores, on walks — takes 4 to 8 weeks of consistent daily practice.
The exact timeline depends on the dog’s age, breed, motivation level, and how consistent the training is.
What age should you start teaching sit?
You can start teaching sit as early as 8 weeks old.
Puppies learn sit extremely quickly at this age because their brains are highly receptive and the behavior is physically easy for them.
Keep sessions very short — 3 to 5 minutes maximum for puppies under 12 weeks.
Adult dogs learn sit just as effectively — often faster because their attention span is longer.
There is no age that is too late to teach sit.
Why won’t my dog sit during training?
The three most common reasons are: the treat is being held too high causing jumping instead of sitting, the training environment has too many distractions for where the dog is in training, or the reward value is too low — the dog simply doesn’t want the treat enough to engage.
Try upgrading to higher-value treats like small pieces of cooked chicken, training in a quieter location, and holding the treat lower over the dog’s head.
Should I push my dog’s bottom down to teach sit?
No — never push a dog physically into a sit position.
Physical pushing creates resistance rather than understanding.
Dogs push back against pressure, so forcing the sit teaches the dog to resist you rather than to respond to the verbal cue.
Use the lure method only — the treat movement causes the sit naturally without any physical manipulation.
How do I teach sit when my dog only does it for treats?
This means the lure-fading process hasn’t been completed yet.
Begin holding the treat in your other hand and luring with an empty hand that makes the same movement.
Then use just the hand signal.
Then the verbal cue with treats coming from a pocket or treat pouch.
The goal is to make the treat unpredictable — sometimes immediate, sometimes after 3 seconds, sometimes from a pocket, sometimes skipped entirely and replaced with verbal praise.
Unpredictable rewards actually strengthen behavior more than constant rewards.
How do I teach my dog to sit in public with distractions?
Every new environment requires starting at a lower level than you think necessary.
In a new location, go back to the lure even if your dog responds to the verbal cue at home.
Use higher-value treats than you use indoors.
Keep sessions very short — 3 to 5 repetitions only.
Over 4 to 6 weeks of practicing in new environments, your dog will begin to generalize the sit command to any location.
This process is called proofing and is the most important stage most owners skip entirely.
My dog sits but immediately gets up — what do I do?
This means duration hasn’t been built yet.
Start by rewarding the sit after just 1 second, then build to 3 seconds, then 5 seconds, then 10.
Reward while the dog is still in the sit position — not after they stand up.
Never release and reward if the dog broke the sit on their own — calmly reset and try again with a shorter duration.
Build duration slowly using the progression: 3 seconds, 5 seconds, 8 seconds, 12 seconds, 20 seconds over several sessions.
Can I teach my dog to sit without treats?
You can, but it takes significantly longer and requires more patience.
Treats are simply the most efficient communication tool available for teaching new behaviors.
Once sit is reliably learned with treats, you can gradually replace food rewards with other things your dog values — a short game of tug, verbal praise and petting, or access to something they want like going outside.
But in the initial learning phase, treats make the process dramatically faster and clearer for your dog.
You Did It — Final Thoughts
That first session where my dog sat on command — from a complete standstill, no lure in sight, just the word “sit” and his rear hitting the ground with his eyes locked on mine — felt completely out of proportion to how simple it was.
But that’s the thing about teaching sit. It’s not just a command. It’s the moment you and your dog figure out how to communicate with each other. And once that channel opens, everything else comes faster.
Now that you know exactly how to teach a dog to sit step by step — here are your three key takeaways:
- The lure movement is everything — treat at the nose, moving back toward the tail, staying low. Get this right and the sit happens naturally within minutes.
- Timing beats everything else — the word and reward must connect to the exact moment of the sit. One second of late reward undoes three repetitions of good training.
- Proof in every new environment — sit at home is the start, not the finish. Take it to the yard,
then the street, then the park. Every new location is a new training level.
For the complete foundation of everything sit builds on — positive reinforcement training, daily routines, common mistakes, and the other four essential commands — read our complete positive reinforcement dog training for beginners guide.
And if your puppy is biting during training sessions — stopping the bite is just as important as starting the sit. Read our guide on how to handle puppy biting and nipping for the complete method.