

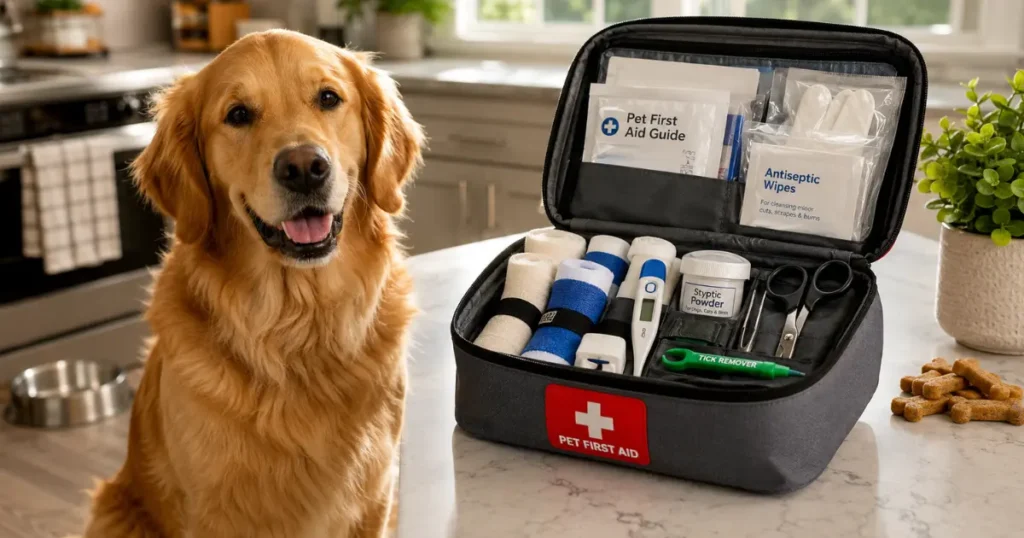
The first time I needed a dog first aid kit, I did not have one.
My dog stepped on broken glass during an evening walk.
Nothing dramatic — a small cut on his front paw pad.
But it was bleeding steadily, he was limping, and I was standing on the sidewalk at 8pm with nothing in my pockets except a phone and a bag of treats.
I wrapped his paw in my jacket sleeve.
Carried him home.
Spent 20 minutes searching the house for gauze, antiseptic, something to stop the bleeding — and found none of it.
Not the gauze.
Not the antiseptic.
Not the styptic powder that would have stopped the bleeding in 30 seconds.
I ended up using paper towels and electrical tape.
It worked — barely.
But standing in my kitchen holding a wad of paper towels against my dog’s bleeding paw, I promised myself I would never be that unprepared again.
The next day I built a dog first aid kit essentials bag that now lives in my closet with a smaller version in my car.
That was two years ago.
I have used it four times since — and every single time, having the right supplies within reach turned a potential panic into a calm, manageable situation.
This guide covers everything you need.
The 15 essential items, how to use each one, what to skip, and whether to build your own kit or buy a pre-made one.
Keep one at home and a smaller version in your car.
Total cost: $40 to $75 for a complete DIY kit.
Why Every Dog Owner Needs a First Aid Kit — Not Just the Adventurous Ones
Most owners think a dog first aid kit essentials bag is for hikers, campers, and people who take their dogs on wilderness adventures.
Wrong.
The majority of dog injuries and emergencies happen at home or during routine walks — not during outdoor adventures — making a well-stocked first aid kit at home the single most important emergency preparedness tool a dog owner can have.
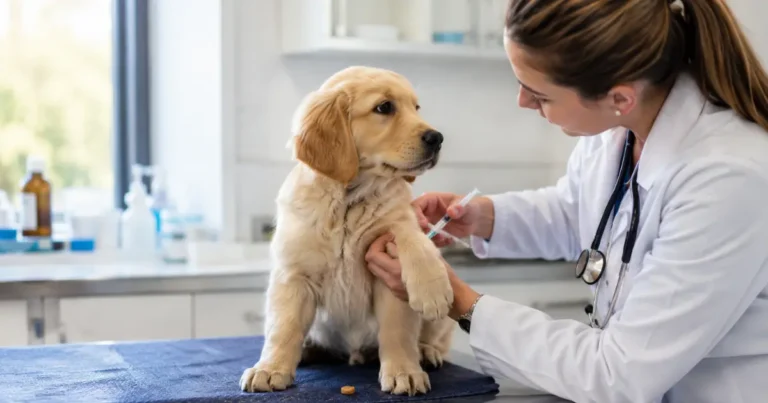
The four times I have used mine: a cut paw pad on an evening walk, a tick found during a post-walk check, a toenail that bled after catching on a rug, and a bee sting on the lip during a backyard play session.
All at home or within 5 minutes of home.
The American Kennel Club recommends every dog owner keep a fully stocked first aid kit at home and a second one in the car — and check both regularly to replace expired items.
According to Dr. Ann Marie Zollo, a specialist in emergency and critical care, preparation is the single most important factor in handling a pet emergency well.
Having the right supplies is not about expecting disaster.
It is about being able to handle the small, common injuries that happen to every dog — calmly, quickly, and without a midnight run to the store while your dog bleeds on the kitchen floor.
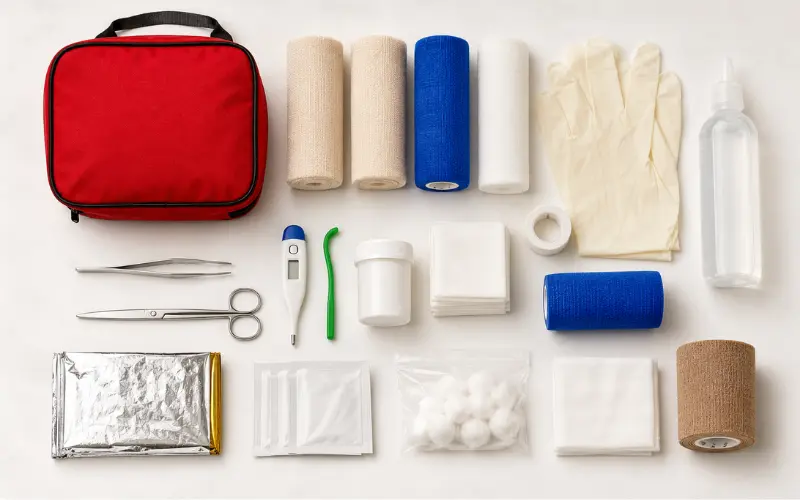
The 15 Dog First Aid Kit Essentials — Complete List
These are the items that belong in every dog first aid kit.
Not the 50-item lists that overwhelm you into buying nothing.
The 15 things that cover 95% of common dog emergencies and injuries.
1. Gauze Rolls and Pads
Gauze is the foundation of any first aid kit.
Sterile gauze pads cover wounds.
Gauze rolls wrap around limbs to hold dressings in place.
You need both — pads for the wound surface, rolls for securing.
Keep at least 2 rolls of gauze (2-inch width) and a pack of 3-by-3-inch sterile pads.
2. Self-Adhesive Vet Wrap
Vet wrap sticks to itself without adhesive — which means it holds bandages in place without pulling on fur when removed.
Regular medical tape sticks to dog hair and causes pain during removal.
Vet wrap does not.
Keep 2 to 3 rolls in different widths — 2-inch for paws and legs, 4-inch for larger areas.
3. Styptic Powder — The Most Important Single Item
If I could keep only one item in my dog first aid kit essentials bag, this is the one.
Styptic powder stops bleeding from nail injuries, minor cuts, and small wounds in 30 to 60 seconds.
Styptic powder containing ferric subsulfate and benzocaine stops bleeding from minor cuts and nail injuries within 30 to 60 seconds — making it the single most critical item in any dog first aid kit, used by every veterinary clinic and professional groomer in the country.
Miracle Care Kwik Stop Styptic Powder — 6 oz The industry standard for over 40 years. Contains ferric subsulfate to stop bleeding fast plus benzocaine for pain relief. 6 oz resealable tub that lasts years.
Used by every vet clinic and professional groomer. Number 1 Best Seller in Pet Styptic Gels and Powders on Amazon.
Not ideal for: deep wounds or punctures — styptic powder is for minor surface bleeding only. Deep wounds need veterinary treatment.
4. Digital Thermometer
A dog’s normal temperature is 101 to 102.5 degrees Fahrenheit.
Knowing whether your dog has a fever before calling the vet gives critical information.
A rectal thermometer (labeled “pet only”) with a flexible tip is the most accurate option.
Keep petroleum jelly in the kit for lubrication.
5. Blunt-Tip Bandage Scissors
You need scissors that can cut through gauze, vet wrap, and tape without the risk of cutting your dog.
Blunt-tip (rounded tip) scissors are designed specifically for this — they slide under bandages without poking the skin underneath.
6. Tick Remover Tool
Tweezers work for tick removal but a dedicated tick remover tool is significantly easier and less likely to leave the tick’s head embedded in the skin.
The tool slides under the tick and lifts it out cleanly with a twisting motion.
TickCheck Premium Tick Remover Kit — Includes stainless steel tick removal tweezers plus a scoop-style remover for different tick sizes. Comes in a leather pouch small enough for your wallet or kit.
Search Amazon for “TickCheck Premium Tick Remover Kit.”
Not ideal for: deeply embedded ticks that have been attached for several days — these may require veterinary removal to ensure the head is completely extracted.
7. Antiseptic Wipes or Spray
Cleaning wounds before bandaging prevents infection.
Use alcohol-free antiseptic wipes or chlorhexidine spray — both are safe for dogs and effective at killing bacteria without causing the stinging that alcohol causes.
Vetericyn Plus Dog Wound Care Spray — Non-toxic, non-stinging wound care spray that cleans and promotes healing. Safe if accidentally ingested. Works on cuts, abrasions, hot spots, and rashes.
Search Amazon for “Vetericyn Plus Dog Wound Care Spray”
Not ideal for: deep puncture wounds or animal bites — these need veterinary treatment regardless of surface cleaning.
8. Saline Eye Wash
Dogs get debris in their eyes frequently — dust, grass seeds, dirt, pollen.
Sterile saline eyewash flushes the eye safely without irritation.
Keep a 4 oz squeeze bottle in the kit.
9. Hydrogen Peroxide (3%) — For Vet-Directed Use ONLY
Hydrogen peroxide can be used to induce vomiting in dogs that have ingested something toxic — but ONLY when directed by a veterinarian or poison control.
Never induce vomiting without veterinary guidance.
Some substances cause more damage coming back up than they do going down.
Some ingested objects can cause choking or esophageal damage during vomiting.
Keep a sealed, unexpired bottle in the kit.
Check the expiration date every 6 months.
10. Disposable Latex or Nitrile Gloves
Protect yourself when treating wounds.
Keep at least 4 pairs in the kit.
11. Emergency Blanket (Mylar)
A lightweight reflective emergency blanket prevents shock-related heat loss if your dog is injured and losing body heat.
Also useful for wrapping an injured dog during transport to the vet.
12. Oral Syringe (No Needle)
A 10 to 20 ml oral syringe administers liquid medications, flushes wounds with saline, or delivers hydrogen peroxide when vet-directed.
Keep 2 in the kit — one for meds, one for wound flushing.
13. Adhesive Medical Tape
For securing gauze pads in areas where vet wrap is difficult to apply — like the head, ears, or tail.
Use sparingly on fur — vet wrap is preferred for most bandaging.
14. Paw Wax or Balm
Paw balm protects paw pads from hot pavement, rough terrain, and salt.
It also speeds healing of cracked or dry pads and creates a barrier against further injury.
Musher’s Secret Dog Paw Wax — 200g — Originally developed for sled dogs. Natural food-grade waxes with Vitamin E. Creates a breathable protective barrier. Lick-safe. Absorbs in seconds.
Not ideal for: paw pads with open cuts or active infections — treat the wound first, then protect with balm after healing.
15. Emergency Contact Information Card
Write these numbers on a waterproof card and keep it in the kit:
- Your primary veterinarian’s phone and address
- Nearest 24-hour emergency animal hospital phone and address
- ASPCA Animal Poison Control: (888) 426-4435
- Pet Poison Helpline: (855) 764-7661
This is the item most kits are missing — and the one you need most in a genuine emergency when panic makes it hard to think clearly.
Pre-Made Kit vs DIY — Which Is Actually Better
You have two options: buy a pre-made pet first aid kit or build your own.
Both work.
But they have different strengths when it comes to assembling your dog first aid kit essentials.
Pre-Made Kits — Good Starting Point
Pre-made kits are convenient.
They arrive organized, labeled, and ready to use.
Most good ones include 30 to 75 items covering basic wound care, bandaging, and emergency tools.
ARCA PET Cat and Dog First Aid Kit — One of the highest-rated pet first aid kits on Amazon.
Vet-endorsed, includes digital thermometer, dog muzzle, tick remover kit, emergency flashlight, and a thorough first aid manual with clear instructions. Compact and portable.
Not ideal for: replacing the individual items you use most frequently — pre-made kits cover the basics but may not include the specific products you prefer (like Kwik Stop styptic powder or your preferred antiseptic).
DIY Kits — Complete Customization
Building your own kit lets you choose every item based on your dog’s specific needs — their size, any medical conditions, and the environments they regularly encounter.
A Labrador that swims weekly needs ear drying solution in the kit.
A Dachshund with back issues needs specific support supplies.
Building a complete dog first aid kit from individual items typically costs $40 to $75 and allows full customization for your dog’s specific breed, size, and health needs — compared to pre-made kits that cost $25 to $50 but may contain items you do not need while missing ones you do.
My Recommendation
Buy a pre-made kit as your foundation, then add the specific items it is missing — styptic powder, your preferred antiseptic, a tick remover, paw balm, and the emergency contact card.
This gives you the organization and convenience of a pre-made kit with the completeness of a custom build.
How to Use Your Dog First Aid Kit — The 5 Most Common Situations
Having the kit is half the battle.
Knowing how to use your dog first aid kit essentials calmly during an actual emergency is the other half.
Situation 1 — Bleeding Paw Pad or Minor Cut
Step 1 — Apply styptic powder directly to the bleeding area.
Press gently for 10 to 15 seconds.
Step 2 — Once bleeding stops, clean the wound with antiseptic wipes or spray.
Step 3 — Place a sterile gauze pad over the wound.
Step 4 — Wrap with vet wrap to secure.
Not too tight — you should be able to slide one finger under the wrap.
Step 5 — Monitor for 24 hours.
If bleeding restarts, swelling increases, or the dog refuses to bear weight — call your vet.
Situation 2 — Nail Trimmed Too Short
Apply styptic powder immediately.
Press into the nail tip for 10 seconds.
Bleeding stops within 30 to 60 seconds in most cases.
If you do not have styptic powder, cornstarch pressed into the nail works as a temporary alternative.
For the complete safe nail trimming method, read our guide on how to trim dog nails at home.
Situation 3 — Tick Found on Dog
Step 1 — Put on gloves.
Step 2 — Use the tick remover tool to grip the tick as close to the skin as possible.
Step 3 — Pull or twist steadily upward — do not jerk or squeeze the tick’s body.
Step 4 — Clean the bite area with antiseptic.
Step 5 — Save the tick in a sealed bag — your vet may want to identify the species if symptoms develop.
Situation 4 — Something in the Eye
Step 1 — Hold the dog’s eye open gently.
Step 2 — Flush with sterile saline eyewash — squeeze the bottle to create a steady stream across the eye from the inner corner outward.
Step 3 — If the debris does not flush out, or if the eye remains red, swollen, or the dog is pawing at it — call your vet the same day.
Situation 5 — Suspected Poisoning
Step 1 — Call ASPCA Poison Control (888) 426-4435 or Pet Poison Helpline (855) 764-7661 immediately.
Step 2 — Identify what the dog ingested, how much, and when.
Have the packaging if possible.
Step 3 — Follow their instructions exactly.
They may direct you to induce vomiting with hydrogen peroxide — or they may specifically tell you NOT to.
Step 4 — Never induce vomiting without professional guidance.
According to the ASPCA, having the poison control number accessible and knowing what your dog ingested are the two most important factors in a positive outcome during a poisoning emergency.
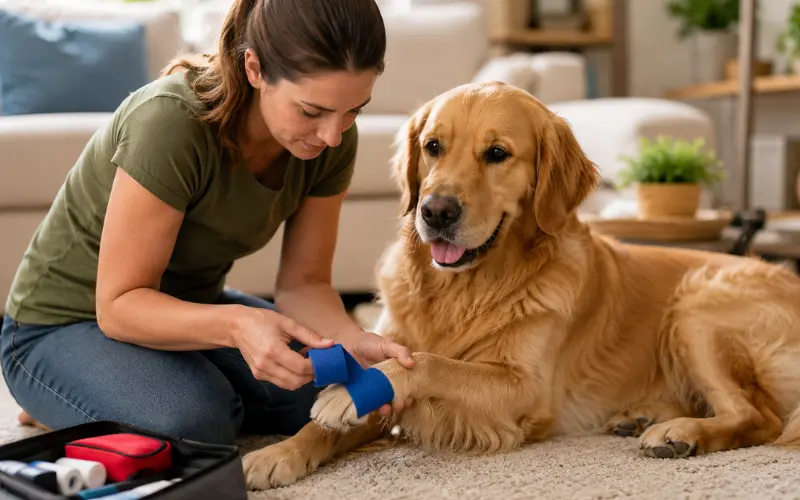
Take out the gauze and practice wrapping your dog’s paw while they are calm and relaxed — with treats.
Practice taking their temperature.
Practice flushing their eye with saline.
When a real emergency happens, muscle memory takes over and you will be significantly calmer because the motions are familiar.
Practicing once — just once — makes you twice as effective during the real thing.
Where to Keep Your Kit — Location Matters
A first aid kit buried in the back of a closet behind winter coats is functionally useless during an emergency.
Knowing where your dog first aid kit essentials are stored is almost as important as having them.
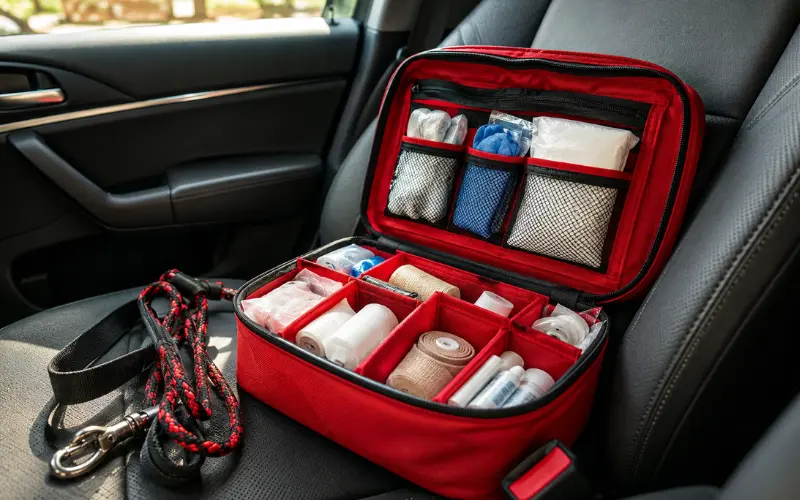
Every dog owner should keep two first aid kits — a complete kit at home in an easily accessible location and a smaller travel kit in the car — because the majority of dog injuries happen either at home or during routine outdoor activities within minutes of the car.
Home Kit
Store in a clearly labeled bag or container in an accessible location.
Not the garage.
Not the attic.
A closet shelf, a kitchen cabinet, or a bathroom cabinet where every family member knows where to find it.
Car Kit
A smaller version with the basics:
- Gauze
- Vet wrap
- Styptic powder
- Antiseptic wipes
- Gloves
- Saline eyewash
- The emergency contact card
Keep it in the trunk or under a seat — accessible without digging through bags.
Travel Kit
If you hike, camp, or take your dog on trips, keep a compact version in your backpack or travel bag.
Ruffify Dog and Cat First Aid Kit — 74 Items — Includes a detachable mini pouch perfect for carrying the essentials during walks and hikes separately from the full kit. Vet approved. 74 items. Compact bag.
Search Amazon for “Ruffify Dog Cat First Aid Kit 74 Items.”
Not ideal for: replacing a full home kit — this is a great travel and car kit but may not include all the specialty items (styptic powder, thermometer) that your home kit should have.
Maintenance — Check Your Kit Every 6 Months
A first aid kit with expired supplies is a first aid kit that might not work when you need it most.
Every 6 months, open both kits and check:
- Hydrogen peroxide — expires, replace annually
- Antiseptic wipes — check packaging for expiration
- Gauze and bandages — if packaging is opened or damaged, replace
- Styptic powder — check that the lid seals properly and powder is not hardened or clumped
- Gloves — latex degrades over time, replace annually
- Saline eyewash — check expiration
- Emergency contact numbers — still current?
- Thermometer — battery still working?
Set a phone reminder every January and July.
Two minutes of checking prevents discovering expired supplies during an actual emergency.
During a genuine poisoning scare, you will not remember the number and you will not want to spend 30 seconds searching for it on your phone.
Having it visible the moment you open the kit saves time that matters.
What NOT to Include — Skip These
Some items commonly recommended for pet first aid kits are either unnecessary, potentially harmful, or better left to veterinarians.
Aspirin and ibuprofen — never include human pain medications.
Both are potentially toxic to dogs.
Your vet can prescribe dog-safe pain medication if needed.
Regular adhesive bandages (Band-Aids) — they do not stick to fur and fall off immediately.
Vet wrap replaces them completely.
Alcohol swabs — alcohol stings intensely on open wounds.
Use alcohol-free antiseptic wipes or chlorhexidine instead.
Splints — improvised splinting by an untrained person can cause more damage than the original injury.
Splint only if a vet instructs you to during a phone call.
Sedatives — never sedate your dog without veterinary direction.
Sedation can mask symptoms that your vet needs to observe for diagnosis.
According to the American Kennel Club, even experienced pet owners should focus their first aid efforts on stabilizing the situation and getting the dog to a veterinarian — not on attempting treatments that require professional training.
Complete Printable Checklist — Your Dog First Aid Kit Essentials
A complete dog first aid kit costs approximately $40 to $75 to build from individual items and should include 15 essential supplies covering wound care, bleeding control, eye flushing, temperature monitoring, and emergency contact information — with a full kit at home and a compact version in the car.
For the complete approach to preventive health that complements emergency preparedness, read our guide on keeping your dog healthy and happy.
According to the ASPCA, preparing a first aid kit and knowing basic pet first aid procedures allows owners to provide immediate care during the critical minutes before veterinary help is available — which can significantly improve outcomes in genuine emergencies.
Source: ASPCA — Pet First Aid and Emergency Preparedness (Open in new tab)
Its purpose is to stabilize your dog and manage minor injuries.
Any injury involving heavy bleeding, broken bones, difficulty breathing, suspected poisoning, or loss of consciousness is a veterinary emergency.
Use the kit to stabilize and transport — not to treat serious injuries at home.
The first aid guidance in this post is based on published recommendations from the AKC and ASPCA.
This guide helps you prepare for common injuries and emergencies — it does not replace professional veterinary care.
Always contact your veterinarian for injuries beyond minor cuts and scrapes.
Frequently Asked Questions (FAQ)
What should be in a dog’s first aid kit?
A complete dog first aid kit should include gauze rolls and pads, self-adhesive vet wrap, styptic powder, a digital thermometer, blunt-tip scissors, a tick remover, antiseptic wipes, saline eyewash, hydrogen peroxide (for vet-directed use only), disposable gloves, an emergency blanket, oral syringes, medical tape, paw balm, and an emergency contact card with your vet, emergency hospital, and poison control numbers.
How much does a dog first aid kit cost?
Building a complete kit from individual items costs approximately $40 to $75, depending on product quality and quantity.u003cbru003ePre-made kits range from $25 to $50 but may not include specialized items like styptic powder or a quality tick remover.u003cbru003eThe best approach is to buy a pre-made kit as a foundation and supplement it with the specific items it is missing.
Can I use human first aid supplies on my dog?
Many human first aid supplies work for dogs — gauze, bandages, vet wrap, scissors, gloves, and saline eyewash are all safe.u003cbru003eHowever, u003cstrongu003enever use human medications on dogs.u003c/strongu003eu003cbru003eAspirin, ibuprofen, and acetaminophen are all potentially toxic.u003cbru003eAlso, avoid alcohol-based antiseptics, which cause unnecessary pain.u003cbru003eUse dog-safe alternatives for wound cleaning and never give any medication without veterinary guidance.
Where should I keep my dog’s first aid kit?
Keep your primary kit at home in an easily accessible location that every family member knows about — a closet shelf, kitchen cabinet, or bathroom cabinet.u003cbru003eKeep a smaller version in your car for walks and travel.u003cbru003eIf you hike or camp with your dog, keep a compact travel version in your backpack.u003cbru003eA kit that is hard to find during an emergency is functionally useless.
How often should I check my dog’s first aid kit?
Every 6 months — set reminders for January and July.u003cbru003eCheck expiration dates on hydrogen peroxide, antiseptic wipes, and saline eyewash.u003cbru003eReplace damaged gauze packaging, degraded latex gloves, and any items you have used since the last check.u003cbru003eVerify that emergency contact numbers are still current and that the thermometer battery works.
Should I buy a pre-made kit or build my own?
Both work well.u003cbru003ePre-made kits provide convenience and organization for $25 to $50.u003cbru003eDIY kits allow full customization for your dog’s specific needs for $40 to $75.u003cbru003eThe best approach is to buy a quality pre-made kit as your foundation and add the specific items it is missing — styptic powder, your preferred antiseptic, tick remover, and the emergency contact card.
Can I use hydrogen peroxide to clean my dog’s wounds?
No — hydrogen peroxide damages healthy tissue and slows wound healing.u003cbru003eIt should only be kept in the kit for inducing vomiting when specifically directed by a veterinarian or poison control during a poisoning emergency.u003cbru003eFor wound cleaning, use alcohol-free antiseptic wipes or chlorhexidine spray, which kill bacteria without damaging tissue.
What is styptic powder, and why is it important?
Styptic powder contains ferric subsulfate, which stops bleeding by contracting blood vessels on contact.u003cbru003eIt stops minor bleeding from nail injuries, small cuts, and surface wounds within 30 to 60 seconds.u003cbru003eIt is the single most important item in any dog first-aid kit — used by every vet clinic and professional groomer — and costs approximately $15 for a tub that lasts for years.
Be Ready, Not Scared — Final Thoughts
Paper towels and electrical tape.
That is what I had the first time my dog needed first aid.
Not gauze. Not styptic powder. Not antiseptic.
Paper towels and electrical tape, applied by an owner who had no supplies, no plan, and no calm.
Building a dog first aid kit essentials bag the next day took 30 minutes and cost about $60.
I have used it four times in two years.
Every single time, having the right supplies within reach changed the experience completely — from panic to procedure, from searching the house to reaching into a bag that had exactly what I needed.
Three things to take with you:
Start with styptic powder.
If you buy nothing else today, buy styptic powder and put it somewhere you can find it.
It is the single most useful first aid item a dog owner can own — and the one most homes are missing.
Keep one kit at home and a smaller one in the car.
Most injuries happen during routine daily life — not during adventures.
A kit that is always nearby is a kit that actually gets used.
Practice once.
Take out the gauze, wrap your dog’s paw, give them a treat.
Practice makes the real thing calmer for both of you.
The first time you use your kit should not be the first time you have ever touched the supplies inside it.
For the complete preventive health approach that complements emergency preparedness, read our guide on keeping your dog healthy and happy.
For understanding the warning signs that require immediate veterinary attention, read our guide on signs your dog is in pain and hiding it.
And for summer-specific safety including heat stroke prevention and pavement burns, read our guide on how to keep dog cool in summer.


Pingback: Oral vs Topical Flea and Tick Prevention for Dogs: 99.9% vs 88.4% Effective
Pingback: Dog Dental Disease: Complete Guide (Why 80% of Dogs Get It by Age 3)